Trouble in 968-land
The miles tell the story. Looking back on 2024 and my driving time with each of my three 968s, the accumulated mileage says much about how I used them. For my speed yellow coupe, I put roughly 200 miles on it. I did two car show events and I had the timing belt done and I took it around the neighborhood a few times to keep it moving. The car is immaculate and now I’m too nervous to drive it so it stays largely preserved in the garage. 51k total miles. Minty faired better. I drove minty almost 1,200 miles consisting of a few PCA and car show event and just general cruising. I enjoy the car too much with the top down to leave it home but 1,200 miles is not a lot. 68k total miles.

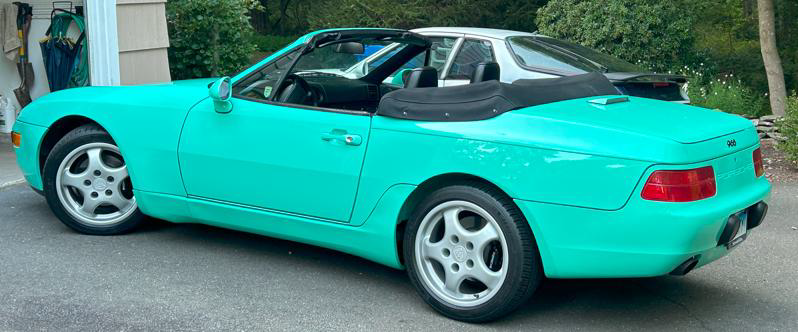
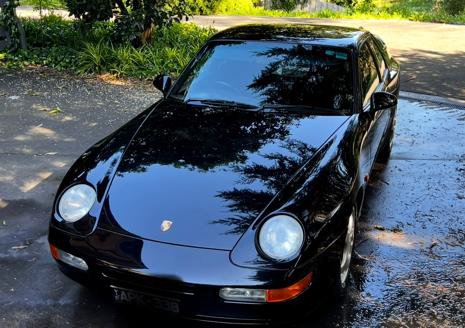
That leaves the Matador project car. I had some work done to it last year by local mechanic Jim and he took care of the pesky oil leaks. He replaced the oil cooler and O-rings and addressed a few other trouble spots. It runs and drives great. and, it is NOT in concours shape. So last year I put over 2,000 miles on the Matador, now at 120k miles. I used it to haul my equipment to my local PCA events. I took it to Lime Rock for a big PCA show. I drove it to get lunch and to run errands. In short, I had a blast with it. It is so much fun to drive. I’ve owned 968s since 1996 and the Matador has reminded me how enjoyable they are to just drive. One big difference is it is not a concours car so I can enjoy it comfortably unlike Minty or the SY coupe which I always have to keep an eye on no matter where I go with them. The Matador has been a blast to own and enjoy. That is, until last November….

Last November I had to go to Home Depot for project supplies. It was a nice day so I grabbed the Matador keys and started on the five-mile journey. I was at the light, waiting to turn into Home Depot, when I noticed a light on the dash. It was the temperature gauge and it was pegged. The car was running fine so I pulled in and quickly parked. I popped the hood to see what was going on. It was hot but all looked normal. I went into the store and did my shopping and came back to re-inspect. It was then that I noticed the coolant reservoir was empty. Oh no, what happened to the Coolant? I looked under the car and all looked good. Maybe it leaked out earlier and I missed it?? I called the wife and asked her to grab the jug of Prestone and come save me. The wife arrived, I refilled the coolant and headed for home. As I made the drive home I started to think about what was going on. Thermostat? Cooling fans not working? Or, a head gasket??!!! But there was no white smoking behind me. The Matador ran great and I made it home without incident with the temperature gauge staying right where it should. I parked the car for a more thorough inspection. Still no sign of any coolant leak underneath so then I thought to pull the dip stick and, OH NO, MILKSHAKE! That’s where all the coolant went!! And to make matters worse, I found oil in my cooling system as well!! The Matador has a big problem.
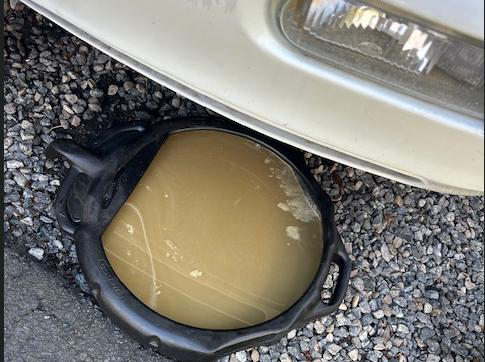
I have since flushed the cooling system. It took about 20 times before I got all the oil out. I also drained and changed the oil. And that’s where we are at right now. I’m waiting for Jim’s schedule to open up so I can tow the Matador down and we’ll see what the story is. I’m thinking the head gasket but we will see. Next newsletter you’ll find out what happened. Will I be lucky and get away with just the head gasket? Or did something crack and I need a new engine? Such a shame since I have enjoyed driving the car so much. Stay tuned….

PCA Parade 2025 – Oklahoma City OK
The 69th annual Porsche Parade will be held in Oklahoma City, Oklahoma this year from July 6th to the 12th. Are you planning to attend? I will be there. If we have enough 968s maybe we can do an event. Even if we don’t have enough, we can always meet for a drink. I would love to meet you. If you are planning to attend, send me an email and I’ll be sure to say hello. Let me know.


968 Option feature:
Code 14301 Leatherette Welting – standard colors – What the heck is welting?
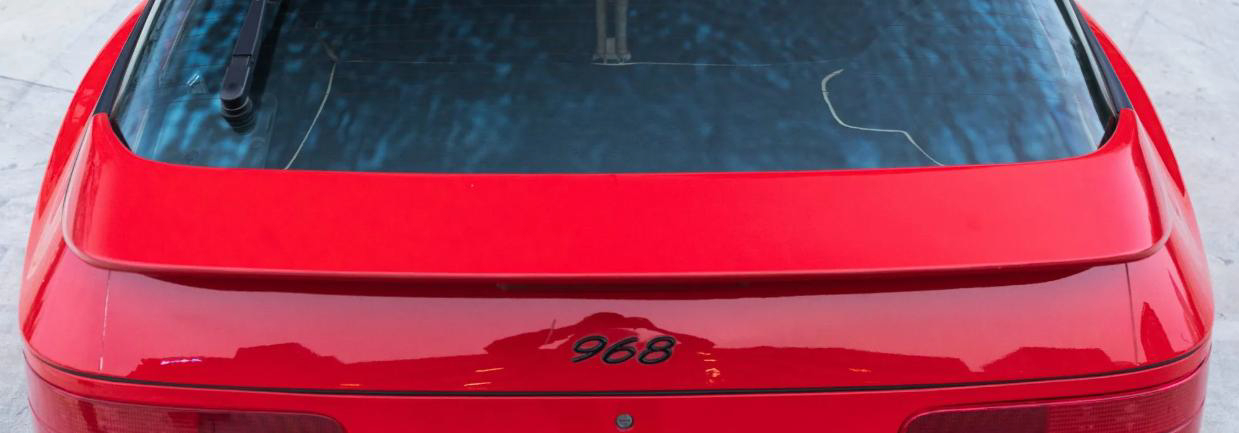
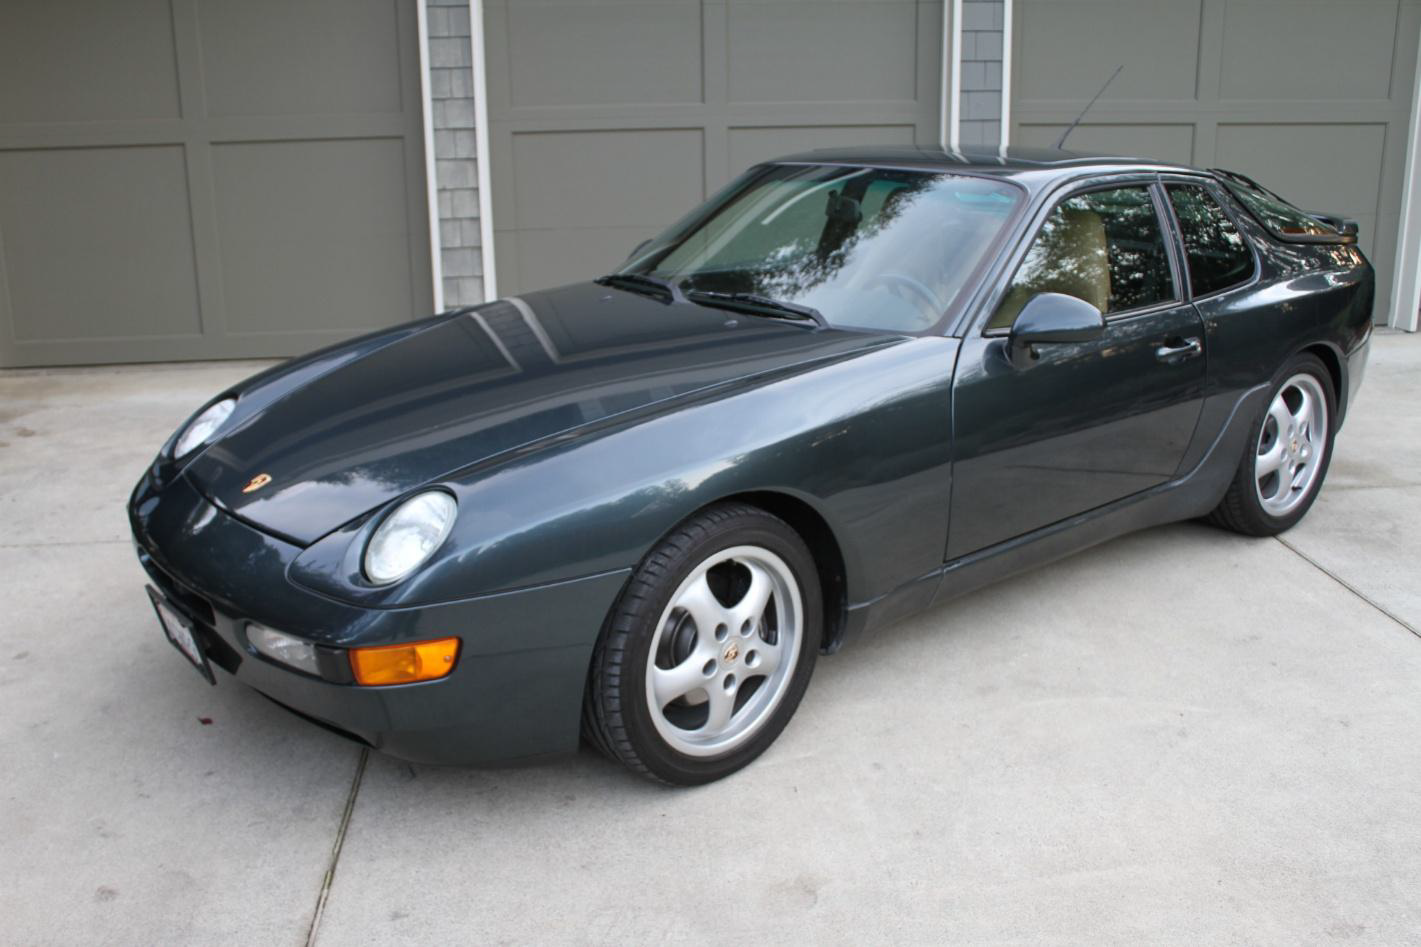
Most of the 968s sold for North America shared a pretty standard configuration. They were well equipped to start with but a few options would usually make their way in. Popular choices were 17” wheels, power seats, audio system upgrades, painted crests wheel center caps, and of course, partial leather. But every once and a while we see an unusual 968 which will feature some rarer options. That happened recently when a pretty standard looking guards red 968 coupe showed up on the Bring a Trailer auction website.
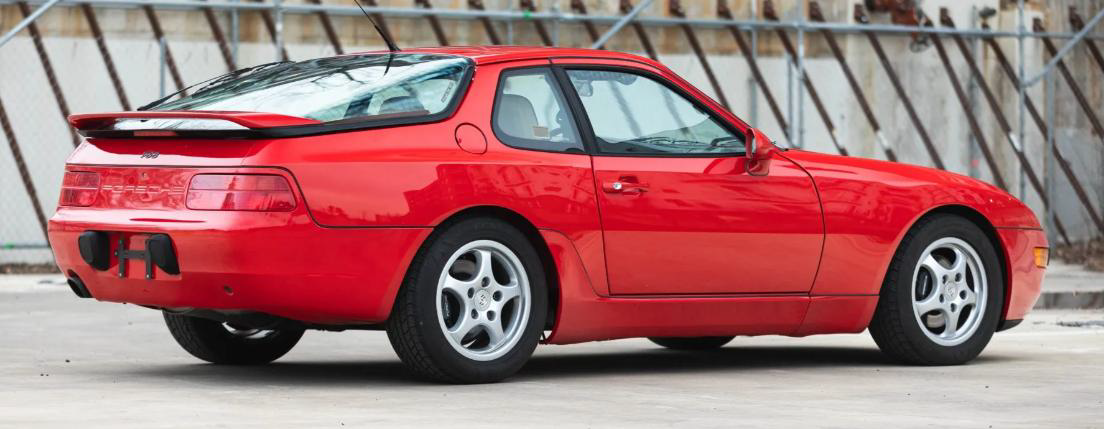
A decently looking car, it was listed along with its original window sticker which included some rare selections made back when the car was ordered new. We found the aforementioned audio system upgrade, the power seats, the wheel center caps, and of course, partial leather. But we had a few additional fun and slightly rarer and desirable options listed including limited slip differential and a painted rear spoiler.
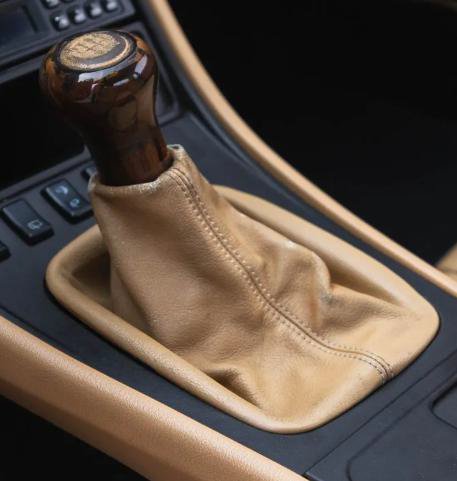
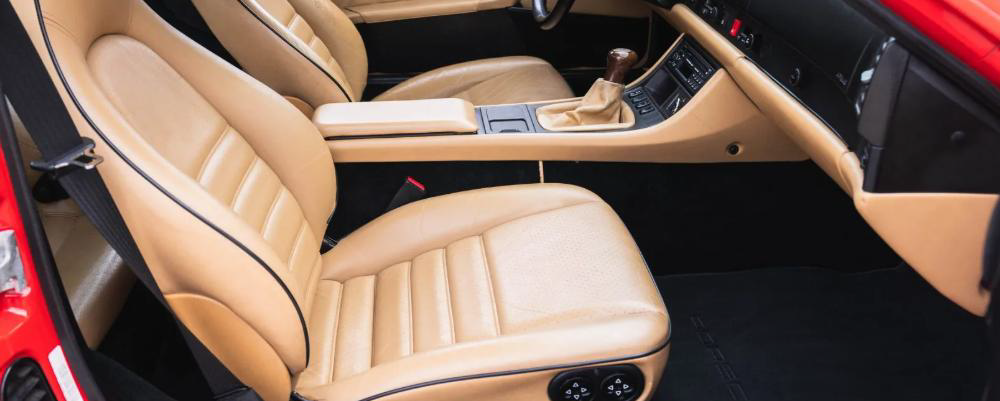
Great, nice car, but then we had the options that made me NERD-out!!! Three of which are super rare but I have seen them before. The first two would include the code XC9 dark rootwood 6-speed shift knob (71 made for NA) and the 13861 seat piping in black (I have 10 spotted so far).
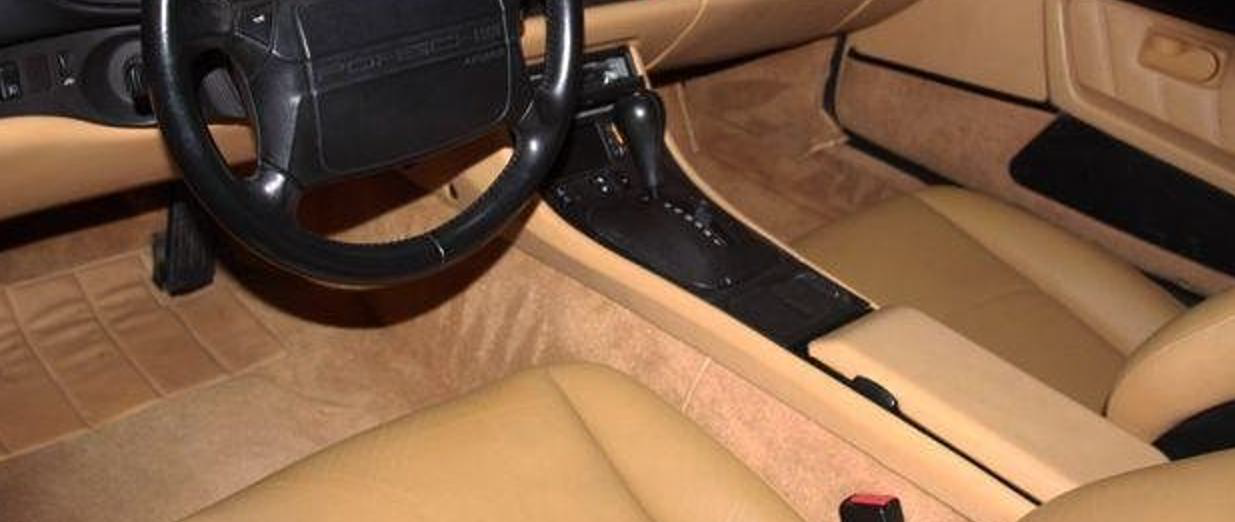
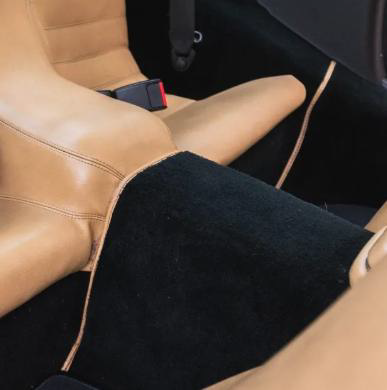
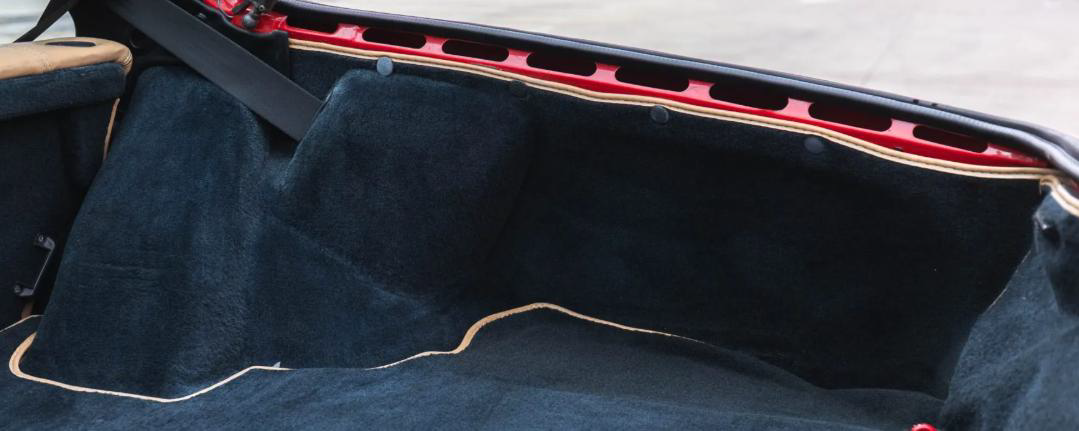
The third is the rarely seen deviated carpet option. On a cashmere interior 968 you usually find everything in cashmere including the carpet (see photo example). Being a super light color, it usually dirties up and owners have challenges keeping the interior looking clean. When this particular 968 was new, someone decided they didn’t want to battle the dirt and optioned the carpets in black. This is a rare and practical option and gives the interior a much different look. Note that the black carpet is even extended to the door panel storage pockets. That is how you can often spot a true deviated carpet car because if a day-2 carpet color change is made they never change the door panel pockets.
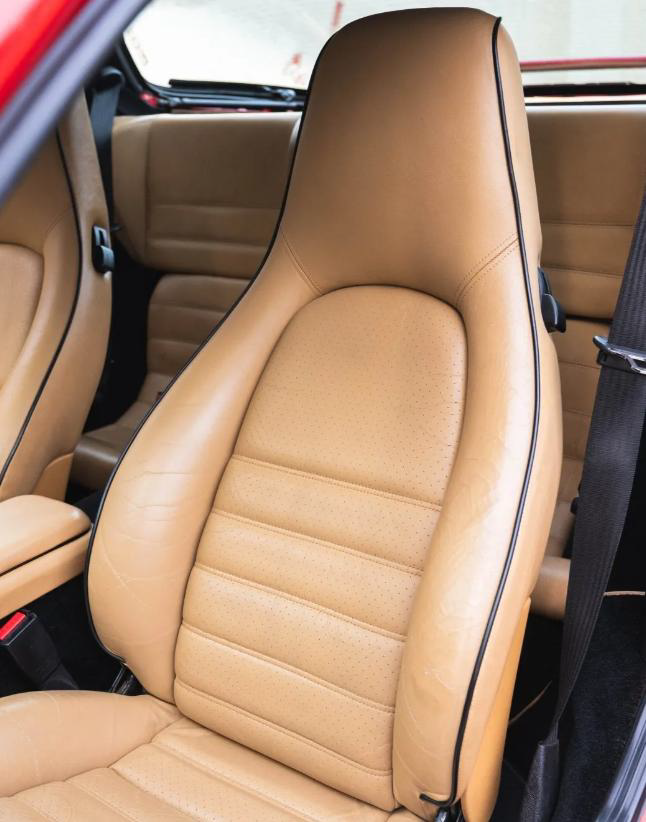
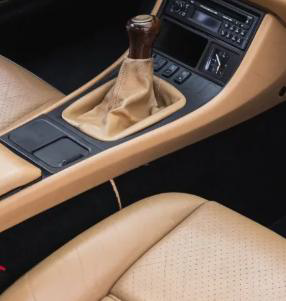
For comparison purposes, here’s a shot of the standard cashmere interior with cashmere carpets. Note the door pockets
All very cool options and I can say I can count the number of 968s that I have seen with these options on both hands. Rare.
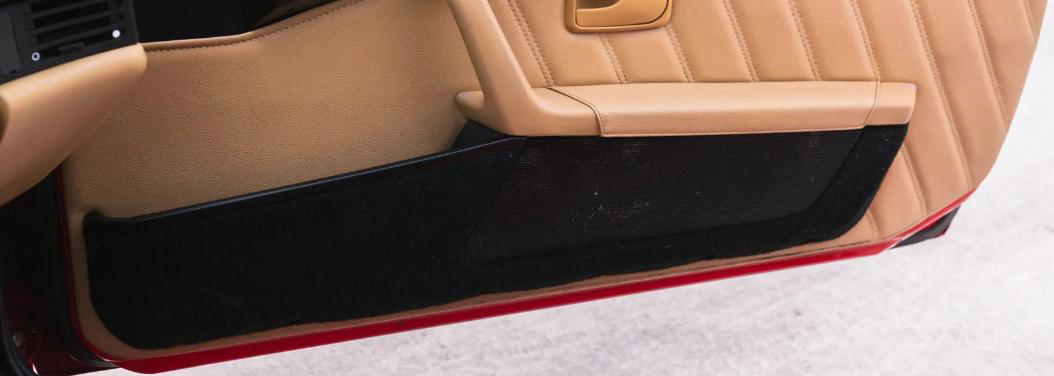
And then there was one last option on the sticker. $163 for leatherette welting, standard colors. But what the heck is welting? Truth be told, I have encountered the option one other time. It carries option code 14301. But the first time I came across it I couldn’t figure out exactly what it was??? Welting is defined as “a thin fabric cord that outlines a sewn edge”. Okay, but what does that mean in relation to a 968??? But then I spotted it. There is a small piece of fabric trim that covers the edge of every piece of carpet on a Porsche and it was easily seen on this 968.
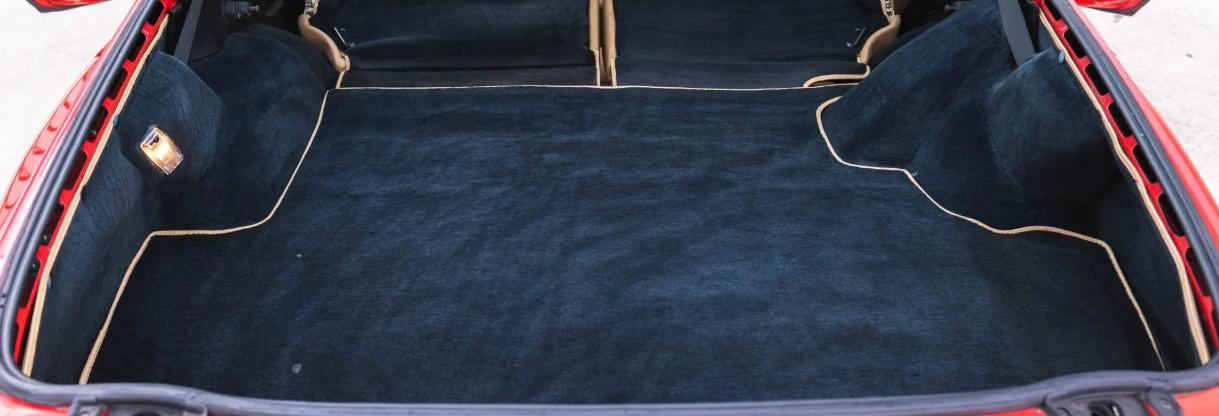
The welting usually matches the color of the carpet so you hardly notice it. In the case of this particular 968 it is easily seen because it is in a deviated color. Here we see the cashmere welting on the edge of the black carpet. In the rear hatch we see the deviated welting on the hatch carpet and side panels. On the pictures below you see the welting extends to the two front carpet pieces as well.
Wow. Very cool. And another example of the early customization options available from Porsche in the nineties. For $163, I think it was a bargain and gave the interior a unique look. Too bad more buyers didn’t know about it.
Discoveries from the ROW 968 database: 1995 model year
Work continues on the ROW (Rest of World) databases and more interesting facts continue to present themselves. One thing I thought I would share with you for this issue is the findings on the true 1995 968s.
Now remember, many of the 1995 968s are 718 cars which, you’ll recall, means they were born as 1994s and reVINed by Porsche to be 1995s using option code 718. That said, there are a handful of true 1995 968s. Below is the scoop on true 1995 968s:
- There were 306 1995 North American 968 Cabriolets but not a single one of them was actually produced in 1995. The last NA cab was produced in July of 1994 and it was actually a 1994 cab, reVINed using option code 718. This was the case with all 306 NA 968 cabs.
- There was only one 1995 ROW 968 Cabriolet produced. It was produced in July of 1994 and it was actually a 1994 cab, reVINed using option code 718. It was a polar silver cab and went to France.
- There were 259 1995 North American 968 Coupes. 199 of these coupes were 718 cars built in 1994 but 60 of them were actually produced in model year 1995, true 1995s, starting in August of 1994 and wrapping up in December of 1994.
- Not a single 1995 ROW 968 Coupe was produced. The last ROW coupe was a 1994 produced in July.
- There were 278 1995 ROW 968 CS Coupes. 86 of these CS coupes were 718 cars built in 1994 but 192 of these were actually produced in model year 1995, starting in August of 1994 and wrapping up in December of 1994.
So, you can see true 1995 968s are pretty rare. Of the 11,605 968s that Porsche produced only 252 were actually manufactured in the 1995 productionl year. So, which one was the actual last 968 produced??? Well, if we look at production dates, the latest date for the true North American 968 coupes was December 14th, 1994. But we have 3 CSs that were built on December 21st, 1994. Interesting note, not a single 968 has a production date in calendar year 1995. Porsche started the new year with the changeover to the new Boxster. More to come from the ROW database!
968 Owner story: by Tom Niejadlik
Here’s short story on the history of a 968 I first encountered back in 1996. I was a much thinner junior in college and every Memorial Day my cousin and I would make the two-hour journey to Lakeville, CT home of Limerock Park. Back then the Memorial Days races were called the Dodge Dealers Grand Prix. I developed an early admiration for the 968. I remember exactly where I saw my first one on the road. I was excited to see a fully track built 968 that day and my cousin snapped this candid photo.
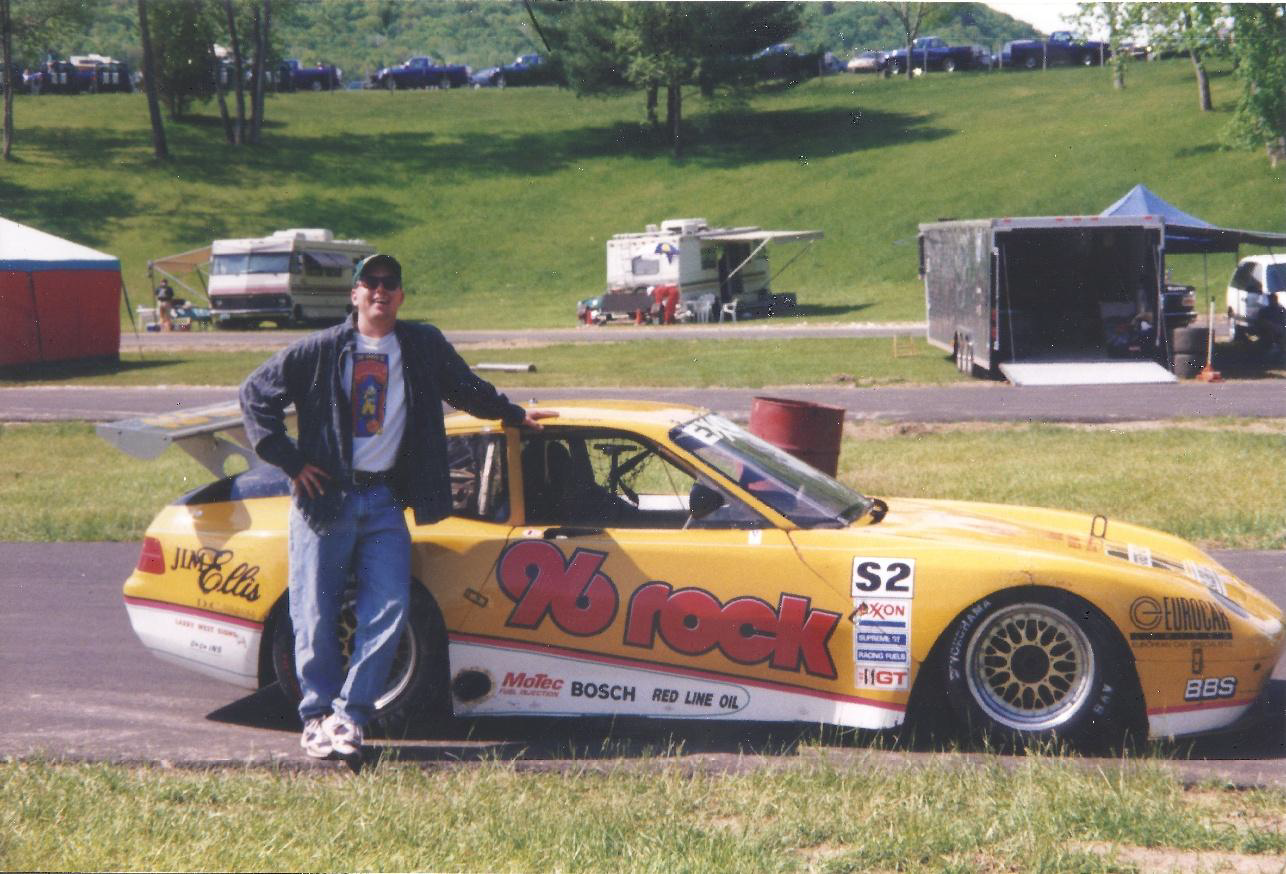
I did a little research and found out that this particular 968 (The 96Rock 968 Turbo) was driven by a gentlemen named Joseph Cogbill. Joe was the owner of German Auto Dismantlers near Atlanta. Joe started racing Porsches in 1979 and was also a fan of the 968. Looking for something unique to campaign in the IMSA series, Joe had Fabcar build him this 968. The car actually started out as 1 of 8 944 GTR’s built by Fabcar for IMSA specifications in 1987. Around 1993 Fabcar converted this to a 968 Turbo for Joe.
This 968 was basically a front engined Indy car (March 87C Indy Car suspension and brakes) with a Hewland transmission in the back. It was a true transaxle car with a 3.0L 968 engine fully built by Joe himself. There are records of the car racing in around 16 races finishing as high as 7th place. Unclear what happened to car after the 1997 season.
That photo hung in my dorm room and later in my cubicle at my first real job. It would be 14 more years before I was in a place where I could afford a weekend track toy. In October, 2010 I purchased this 1994 968.

Fast forward to 2022. I sold my 968 a few years back to a gentleman named Mark. I met Mark during a track day at Thompson Speedway Motorsports Park. Obviously, a fan of the 968, he approached me and asked how it was on the track. I jokingly replied, “do you want to buy it” and about a week later he owned the car. Then in 2024, I was on I395 North and passing by Thompson Speedway. I knew there was a track day happening that day so I stopped in to see if my old 968 was there so I could say hello to my old car. Mark is taking very good care of it. And then I spot this in the paddock…
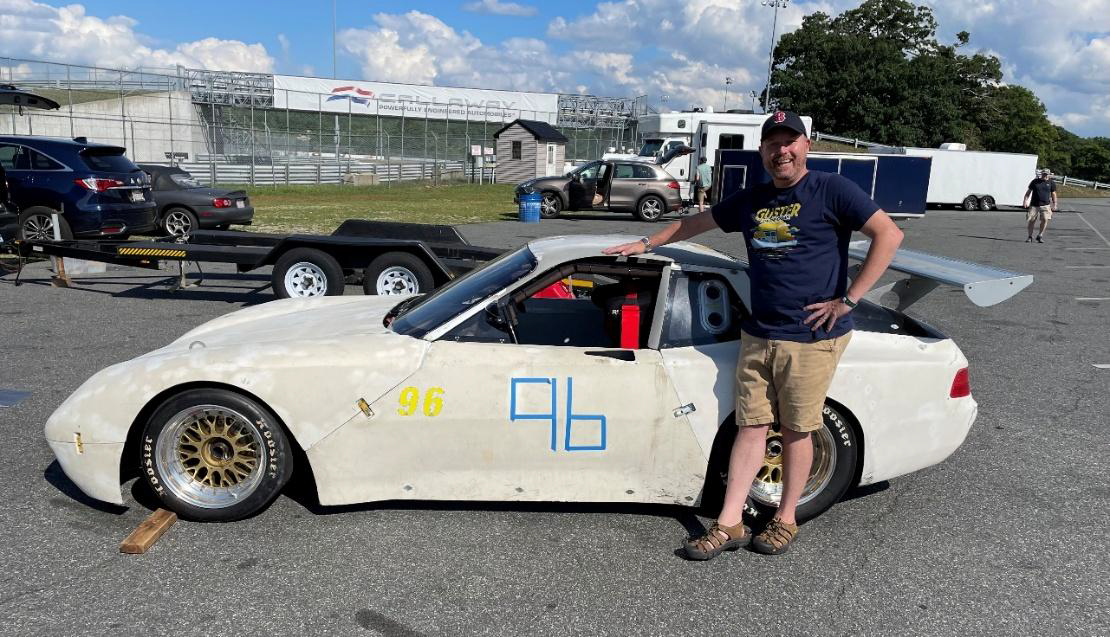
Sure enough. There she was. Looking a little older (just like me). 26 years later and still enjoying track days. Unfortunately, I didn’t get to meet the owner but I knew right away it was the same car. The ‘96’ on the door sealed the deal. -Tom Niejadlik ME
Another Amazing ROW 968 cabriolet:
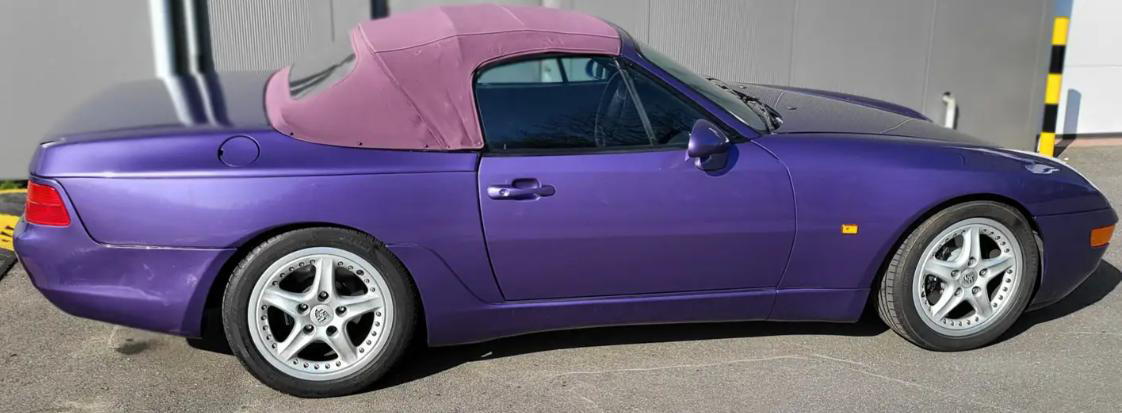
968 Register member Alex always has his eyes open for interesting 968s from around the world and he recently spotted another one and sent it to me. This car was for sale at a dealer in Germany. Looking at the picture you can certainly take in how unusual it is. What we have here is NS813221, a late 1992 produced 968 cabriolet in the optional special metallic hue of code 57 Violet Blue. But the unusualness of this car goes on from there with the choice of interior and cabriolet top, both in Magenta!

A magenta cabriolet top is unusual but you will usually find it paired with Amethyst as it works well with the color. Pairing it with other exterior colors results in a striking result and this 968 is an example of that.

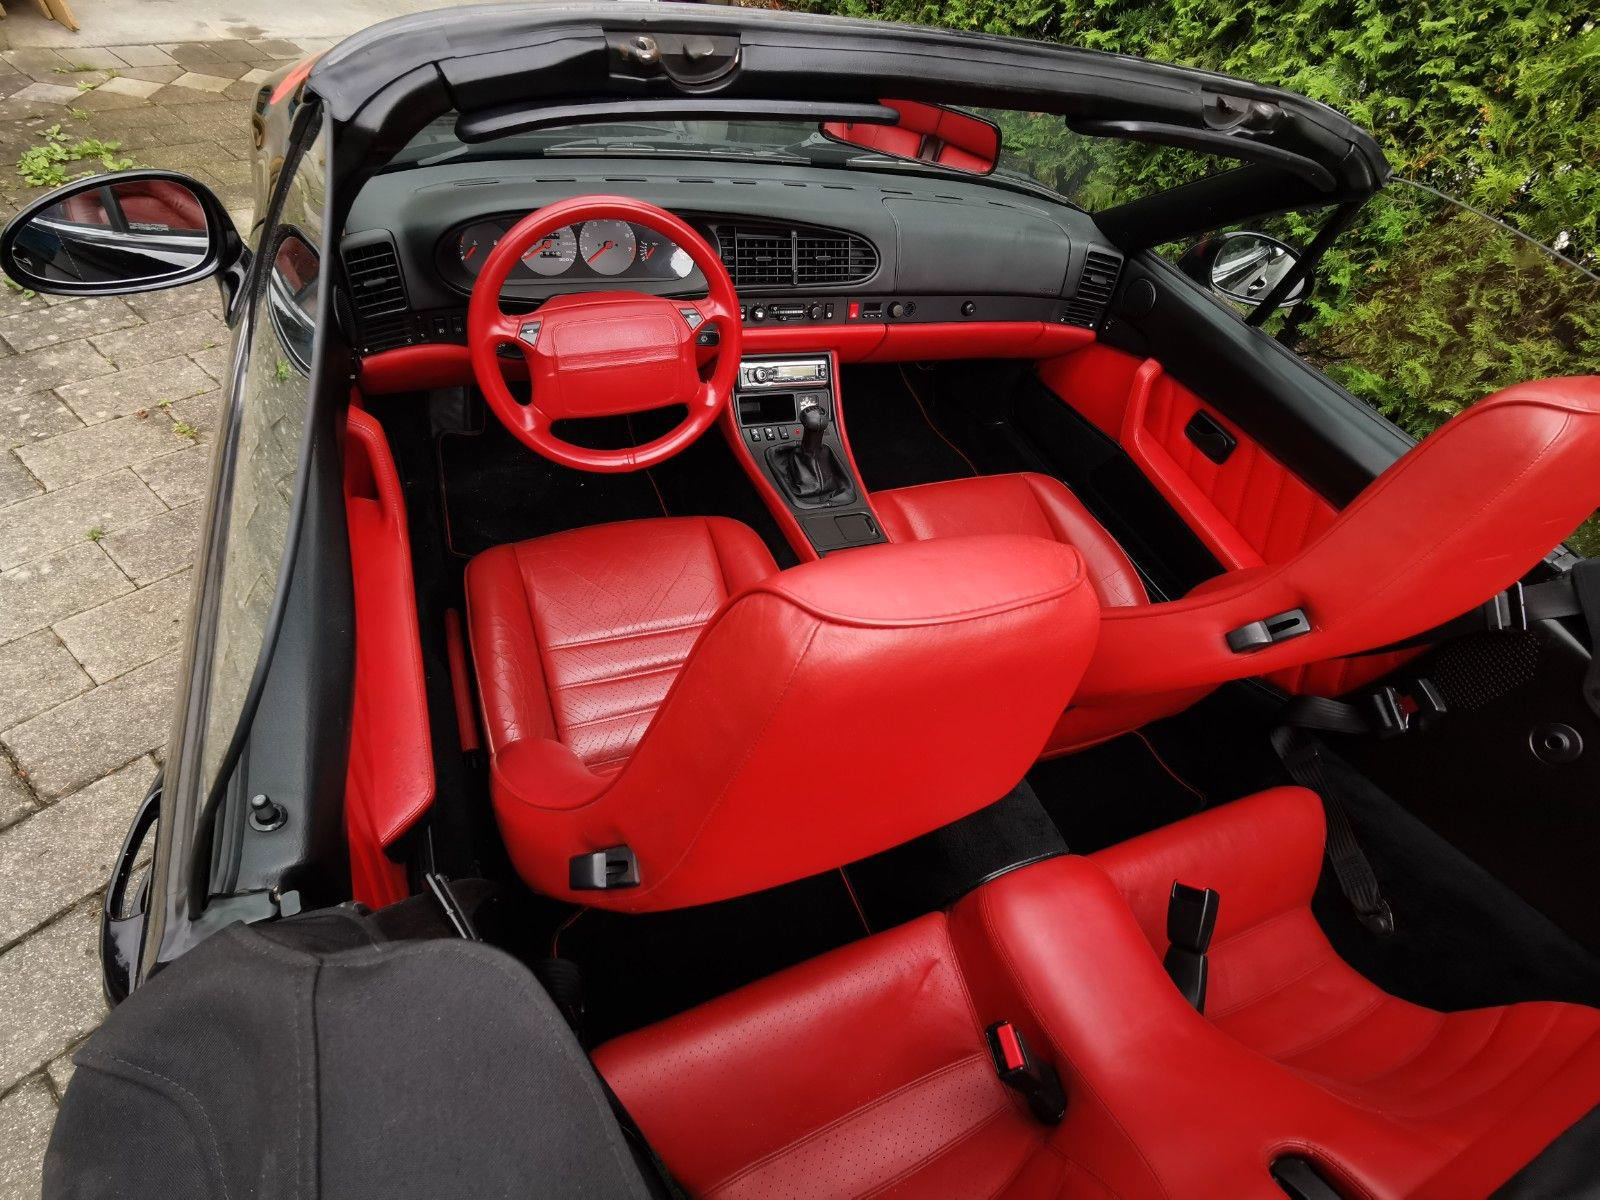
We continue on from the exterior with the choice of multicolor cloth interior, also in Magenta. This example is even more special as it was ordered with full multicolor cloth seats as opposed to just the inserts.
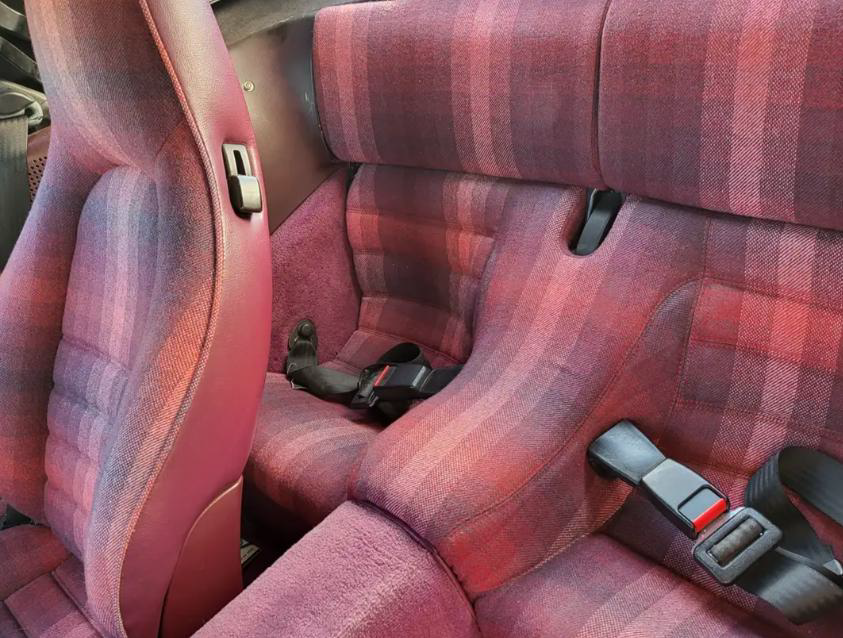
And then to top it off, whoever spec-ed the car added the option code 526 cloth door panels which carried the Magenta multicolor cloth onto the door panels! Wow!!!
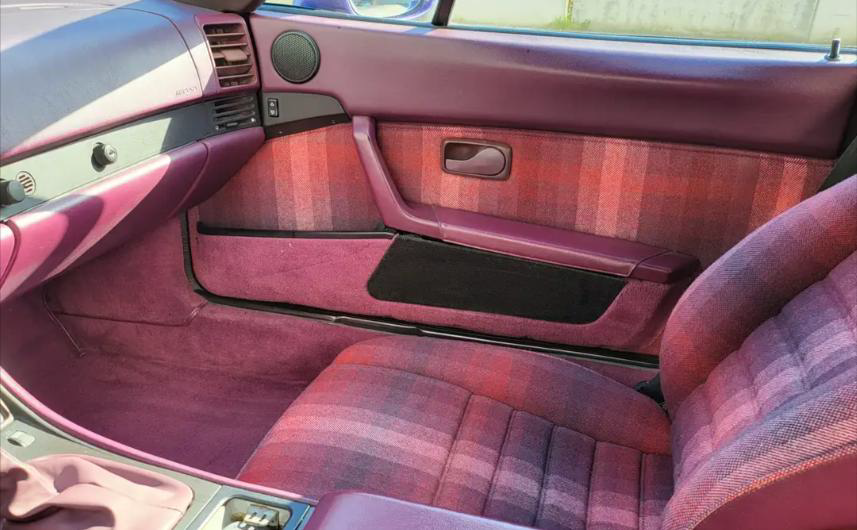
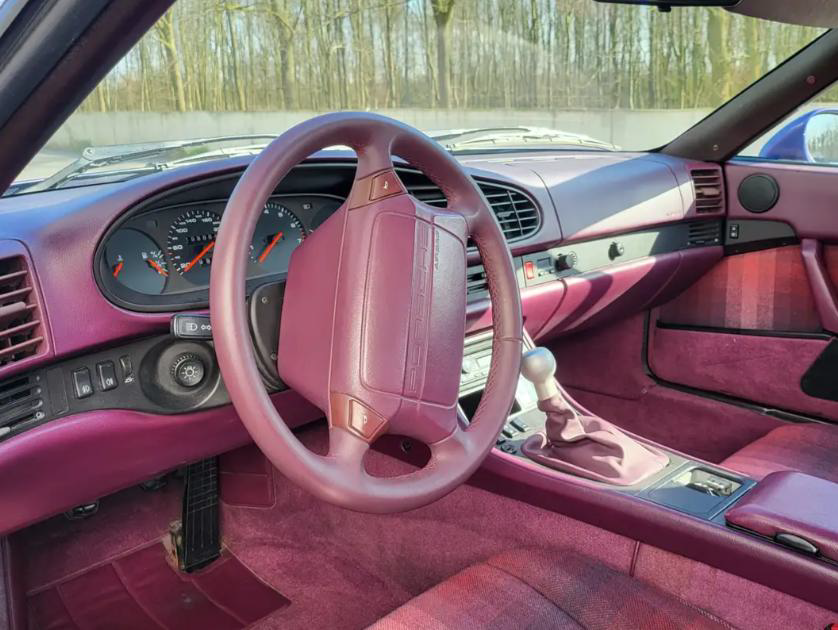
I’m sure you would agree the results are quite striking. You also might expect that a 968 cab like this would be outfitted with a Tiptronic but you would be wrong. Placed in the center console is that wonderful 6-speed manual shifter.
As cool and unusual as this 968 is the story gets even better when we learn that that this cab is 1 of 2 produced, identically spec-ed, in sequential order, NS813221 and NS813222, for the German market, both on June 15th 1992. Can you imagine the two of them together? I can only guess that there must be some interesting story behind their creation. Some promotional task that they were used for? Or maybe a couple that both wanted the same 968s? Stunning result.
PCA 968 Register on Social Media:
Our PCA 968 Register Facebook continues to grow. I’m trying to do a good job at screening the new member adds. There are a lot of Bots out there that want to join. We are 2 years old now and up to 465 members. Not bad. We’ve had some great 968 conversations and I’m sure to post something new at least once a week. If you haven’t, join us, what are you waiting for? Visiting the group is a great way to get your 968-fix on a daily basis.

You’ll also note we changed our name to make the group easier to locate.
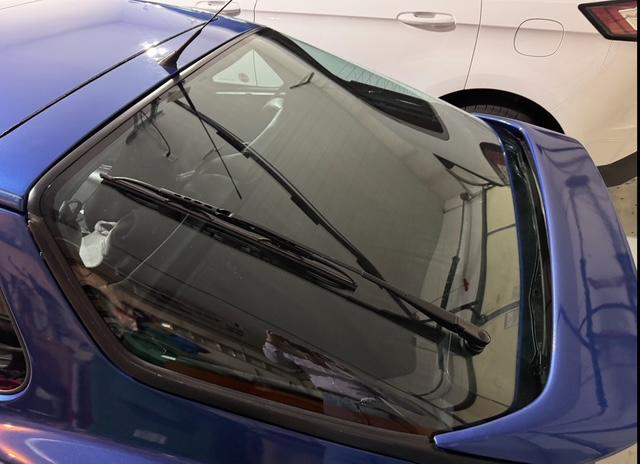
968 Tech: 968er Jeff Hammond shares his experience: How to reseal a Porsche 968 Glass hatchback (with a dash of humor)
So, you’ve got a glass hatchback that’s leaking more than a sieve during a monsoon. Fear not, intrepid car owner! With a little elbow grease, some windshield urethane, and a touch of humor, you’ll have that hatchback watertight faster than you can say “leaky lemon.”
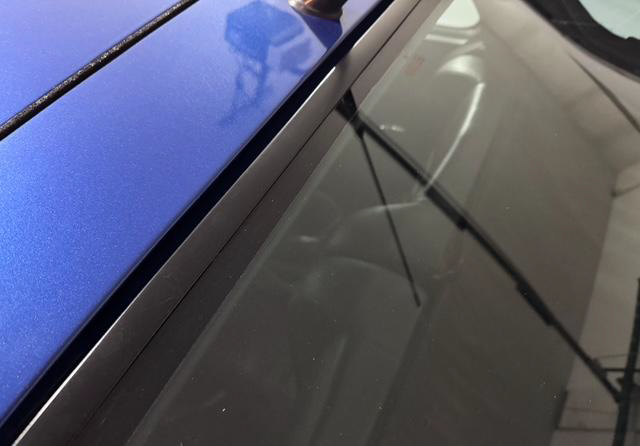
- Diagnose the Leak: First things first, grab your detective hat (or a baseball cap, if that’s more your style). Inspect the hatchback for gaps or suspicious-looking areas (especially prevalent along the top edge of the frame). If you find any, mark them with a piece of tape or a tiny flag. Bonus points if you use a magnifying glass and pretend you’re Sherlock Holmes.
- Remove the hatch from the car: This comes with a couple of steps. First, remove the side trim (hockey sticks – no pucks included!) and the rear bridge spoiler. The hockey sticks are held on by some evil round threaded nuts that there must have been some special German tool back in the day. What can work is to get a flat blade screwdriver and use a Dremel tool to remove the center portion of the blade leaving two outer edges. Alternatively, if you buy a security bit set from Amazon, the 10 slotted bit can work. Once the sticks are off, there are some M5 nuts and Phillips screws for the bridge spoiler. The third brake light connection is under the bridge spoiler and will need to be unplugged. Remember to unplug the rear wiper in TWO places – at the motor itself, and secondly, along the driver side (left) cargo area close to the sunroof motor. Fish the wire back through the C pillar and remove along with the rubber grommet. Last step is to take the hatch struts off the hatch itself and remove the four 4mm hex screws.
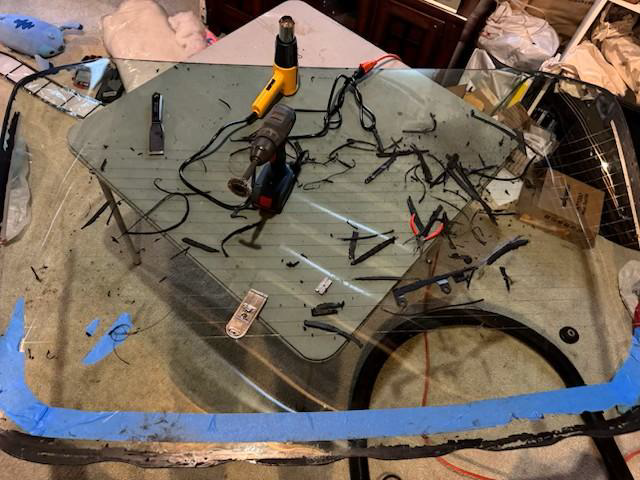
- Remove the Old Sealant: Channel your inner superhero (preferably one with a cool name like “Captain Caulk”) and remove the old sealant. A putty knife with a sharp beveled edge and a heat gun works wonders here. Imagine you’re battling an ancient curse—the curse of water infiltration! Dramatic music optional. What I ended up doing was a combination of this and purchasing a Harbor Freight T-handle windshield removal tool. Patience is key, I ended up taking over a week to get the glass separated from the frame – I wanted no part of breaking the glass. If you had a nice prior owner (I didn’t, and in this instance, it was a help), be very careful when you get close to the rear wiper area, as the wire harness pigtail for the third brake light is sandwiched in between the glass and the frame. If you cut this, any swear words are certainly appropriate, as Porsche does not offer this pigtail harness. My (stupid) prior owner did a wiper delete and cut this harness in two. I won’t even begin to get into how difficult it was to properly solder the flat wires back together.
- Clean the Surface: Like a surgeon scrubbing up before an operation, clean the glass and the frame. For the frame, I used a combination of razor scraper and a brass brush on a drill to remove the existing sealant. Use rubbing alcohol (the good stuff, not 70%) on both the glass and the frame. Pretend you’re hosting a spa day for your hatchback—bubble bath not required.
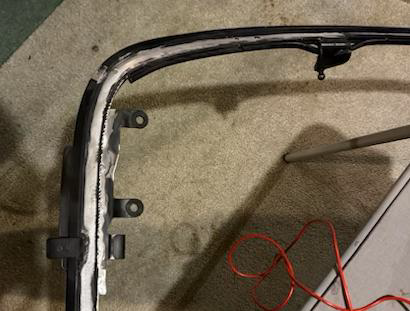
- Prepare the frame for sealant: I believe this is where the project can either succeed or fail – be meticulous. There is a primer (3M Single Step Primer #08682) needed for the glass and frame. It has also been referred to as frit (the black strip you see on the glass if it hasn’t totally disappeared due to delamination). BEFORE applying the 3M primer to the frame, use a 2K epoxy primer on the portion of the frame that will be accepting the urethane. 3M instructions say this, so I’m trusting that chemists and engineers there know what they’re talking about. After the 2K epoxy has dried (I gave it at least 24 hours of cure time), you can apply the One Step Primer to both the glass and the frame. I masked the glass with about a ¾” strip around the perimeter to make a clean line.

- Choose Your Sealant: 3M Windo-Weld Super Fast urethane sealant (#08609) is your trusty sidekick in this adventure. It’s flexible, waterproof, and has a knack for sealing gaps. Apply it generously to the marked areas. Imagine you’re frosting a cake, but instead of sprinkles, you’re using watertight magic.
- Smooth Operator: Use a caulk gun, (battery operated, if you’re feeling fancy) to lay a bead of the sealant. Pretend you’re an artist creating a masterpiece. Bonus points if you hum Beethoven’s Symphony No. 9 while doing so.
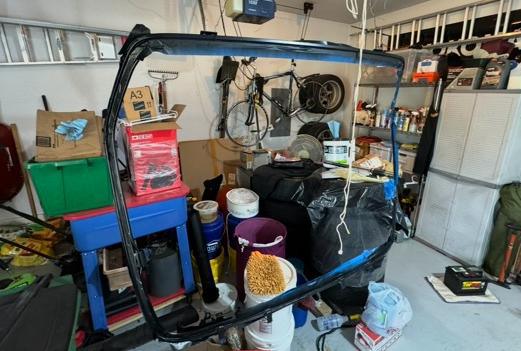
- Let It Cure: Patience, young grasshopper! Let the sealant cure according to the manufacturer’s instructions. Use clamps around the perimeter of the frame and ensure that the glass is not above the level of the frame in any area. During this time, avoid touching the hatch, just admire what you have accomplished so far. Imagine it’s a forbidden treasure chest—you don’t want to break the spell too soon.
- Rebuild the hatch: Once the sealant has set (I waited three days), remove the clamps and carefully trim any excess urethane away. Mount the top trim piece first, it’s kind of a angle and snap into place operation. Bring the hatch back to the car, and reattach the 4mm hex screws through the inside of the car and the support plates into the hatch brackets. Once this is done, remount the hockey sticks. You should find that some of the holes in the frame are likely filled with cured urethane. Carefully use appropriate drill bits or similar tools to remove the cured urethane from the holes. Then mount the bridge spoiler (reverse of removal).
- Test the waters: Unleash the hose upon your hatchback. Observe it like a scientist studying a rare species. If water doesn’t spray back into the car along the top edge, victory is yours! If not, well, let’s not think about that.
- Celebrate! Pop open a can of soda (or sparkling water, if you’re health-conscious) and toast to your newfound leakproof hatchback. You’ve conquered the leaky beast! Imagine confetti falling from the sky as you bask in your glory.
Remember, my dear car enthusiast, resealing a glass hatchback is like sealing a friendship—it requires effort, a sense of humor, and a touch of magic. Now go forth and keep those cargo items dry, whether it’s groceries, camping gear, or your secret stash of rubber ducks.
*** Helpful hint from Jeff – The key is when regluing, to make sure the trim clip fits well over the top part of the glass. I had to massage mine a bit because I didn’t have it clamped quite tight enough in the passenger top corner.
Thank you Jeff Hammond for your tech contribution to this E-newsletter!!!
Have you had recent success on a project that you would be willing to share with the group?
Have an interesting 968 story to share?
If so, write it up and send it along. Be sure to include photos. Thanks!
Sincerely,
Jeff Coe
